Production-Accompanying Calibrations
Calibrated gauges are a fundamental aspect of a comprehensive quality management system. That is why gauges are calibrated at fixed intervals either by companies themselves or via external calibration laboratories and fitted with a label that states the calibration date. What if, however, the imprecision occurs shortly after the gauge was calibrated in the laboratory? How can one tell, what number of parts were incorrectly measured in the interim?
 Process-Accompanying Calibration
At this point the production-accompanying calibration comes into play. This technique allows one to effortlessly check and document the precision of the gauge directly at the inspection site while the production process is underway.
Minimize Production of Substandard Goods
If the daily inspection cycle consists of e.g. the inspection of 100 parts, the production-accompanying calibration allows one to determine a fixed interval at which a standard shall be measured instead of a produced part. This inspection takes place right during the production process. It is not necessary that the gauge leaves the inspection site or that the inspection process is interrupted. If the inspection cycle consists of e.g. 100 parts, inconsistencies in the accuracy of the measurements can be identified after a comparatively small quantity of produced parts. This significantly minimizes the production of substandard goods.
React Faster
If, in turn, one relies solely on the fixed calibration interval of e.g. 1 year, one cannot determine at which time in the interim the irregularities occurred. The production of substandard goods could, in this case, increase from e.g. 50 with production-accompanying calibration to something like 30,000 without production-accompanying calibration. The fact that the quick calibration is recorded in the CAQ.Net system also means that one is always able to provide up-to-date information with regard to the calibration status of each gauge and, hence, the accuracy of the measurements conducted.
Be Able to Report at Any Time
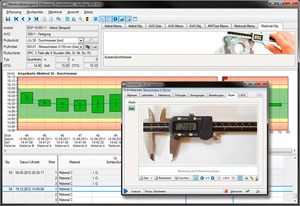
The production-accompanying calibration takes place directly in the Quality Inspection Software Compact.Net and there is no need to switch to the Calibration Management Software PMM.Net. The calibration therefore takes place right during production, at the same inspection site and in the same software. This essentially means the calibration becomes an integral part of the inspection process: the inspection process is underway, the screen for the quick-calibration appears, the measurement with the standard is executed and documented, and the inspection process continues just as before. The intelligent structure of CAQ.Net means that information gathered during the process-accompanying calibration is transferred directly to the gauge management module where it is included in the gauge history and can be used for deeper analysis. This function not only facilitates a significant reduction of substandard goods, but also enables direct reporting with regard to current gauge calibration statuses.